|
|
|
|
|
|
|
|
|
|
|
|
![]()
![]()
![]()
![]()
![]()
![]()
| Bitlocker Woes - Dec 13, 2014 |
 It's one thing to manually update a desktop or laptop's Bios. But it's another when you're talking hundreds of machines. Recently I blasted out a Bios update to a bunch of desktop models - however I forgot that some of them were running Bitlocker. Introduced in Windows Vista and included in every release since, Bitlocker offers full drive encryption. It's one thing to manually update a desktop or laptop's Bios. But it's another when you're talking hundreds of machines. Recently I blasted out a Bios update to a bunch of desktop models - however I forgot that some of them were running Bitlocker. Introduced in Windows Vista and included in every release since, Bitlocker offers full drive encryption.Unfortunately, when you apply a Bios update to a Bitlocker enabled system you have it crap out upon reboot as it sits there requesting the decryption key. And it'll keep asking for this on every subsequent reboot. Ok, so how to handle it then? Before applying the update, go into Control Panel, System and Security, Bitlocker Drive Encryption and Suspend it. Then after applying the Bios update and rebooting go back into Control Panel and tell it to Resume Protection. That works great for individual systems, but again, what about when you're doing a mass deployment? You have to do it programmatically using the 'manage-bde' command. There are obviously different languages you can use, but I ended up using VBScript. I tested by running the script and everything worked fine. However, we use SCCM to deploy updates and when testing with it the update would run, but the code to handle Bitlocker wouldn't work. It didn't make sense and it took me awhile to figure out what was going on. The systems in question are all 64-bit, but the SCCM client is 32-bit. So what happens is that when you reference the System32 directory or try and write something in the registry things end up going in the wrong places. A good description can be found here. I tried handling both running the command and updating the registry in the code, and while I got the command working I just couldn't get the registry part working. No matter what I tried it would put the required value in the Wow6432Node key. Then I realized a simpler solution. All I had to do was call the VBScript code using the sysnative variable and the entire program would then run in the appropriate context. This is the command I used in my SCCM program:
I'm not an official programmer, so I'm sure my code isn't the best - but it works. Note, this is coded to update Dell systems, modify that section as appropriate for your Vendor. Hopefully this is helpful to those Admins who encounter the same problem. ' Bitlocker Handler |

| It Just Works - My Ass! - Nov 29, 2014 | ||||||||||
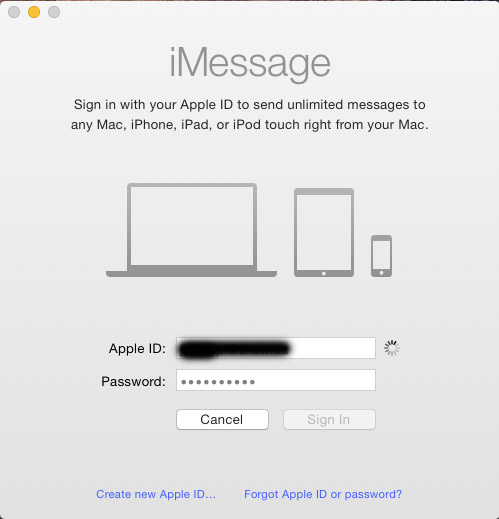
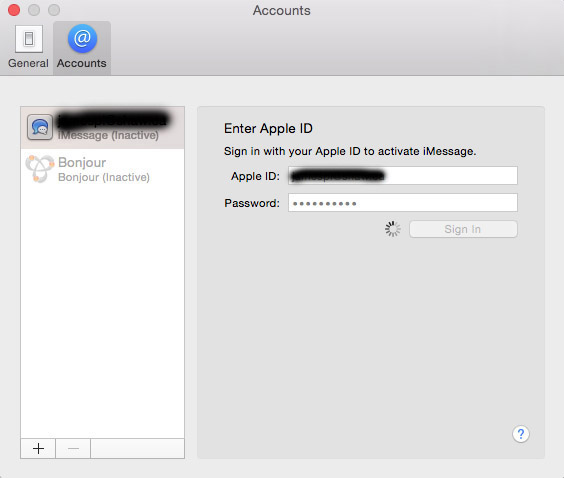
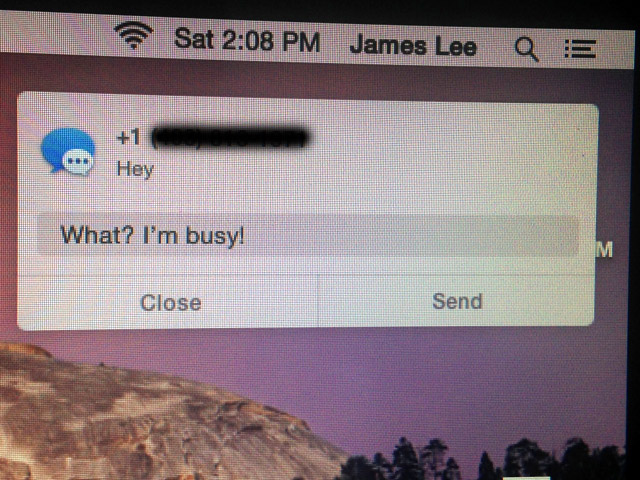
 On my old iMac I am still running Snow Leopard which is now four OS revisions behind. But I still like it, it's solid, stable, and bug free. It's also the last OS before Apple started trying to shoehorn features from iOS into it. Which was something I really was resistant to. If I want to run iOS I'll use my damn iPad!! On my old iMac I am still running Snow Leopard which is now four OS revisions behind. But I still like it, it's solid, stable, and bug free. It's also the last OS before Apple started trying to shoehorn features from iOS into it. Which was something I really was resistant to. If I want to run iOS I'll use my damn iPad!!That said, some of the features that were ported over are kinda neat. I particularly like that the Notification Center was now available on OS X. First introduced in OS X Lion, it's been subsequently tweaked and fixed in the various releases up until the latest - OS X Yosemite. As my new iMac that I bought came with Yosemite I thought I'd test it out. Apple's slogan for the longest time was 'It Just Works' so how hard could it be right? In order to get information from Messenger showing I had to first set it up. To do so you run the program and it prompts you to log in with your Apple ID. This is the same ID that is used in iTunes, iCloud and so on. I entered my information.....and.....waited.....and waited.....until it eventually gave me some kind of error. Off to Google I went and tried a bunch of stuff none of which worked. Then I came across an obscure post saying that if your Mac didn't have a serial number registered you couldn't log into Messenger (or Facetime). So I checked, and sure enough instead of the serial number it just said 'unavailable'. What the hell? Apparently that can happen when a logic board is swapped out and the tech forgets to update it, or even something as simple as replacing the hard drive can cause it to disappear. As I bought my iMac from someone else my guess is they upgraded the hard drive before selling it to me. Ok, so now what? After some more searching I found a post and a link that supposedly had the software that the Apple Techs use to reset the serial number. I wasn't overly keen on running some software that I didn't know who the source was from, so I looked at the other option - which was to put in a call to Apple Support. So I went to the website and looked at the various options - receiving a call back, or entering a chat session. Of course to do so, they wanted the serial number! Nice Catch-22 that I was in.
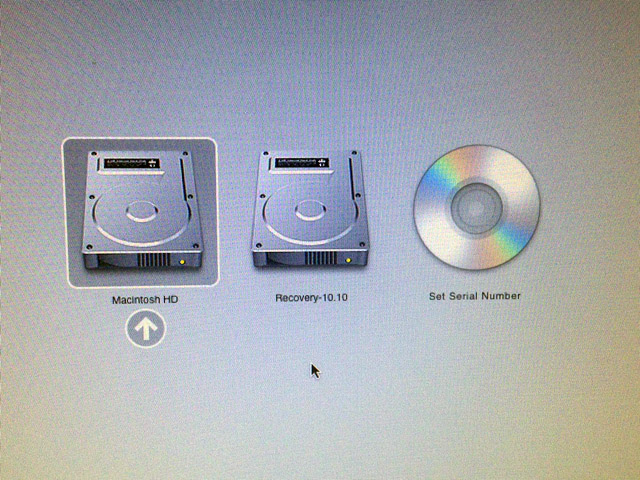
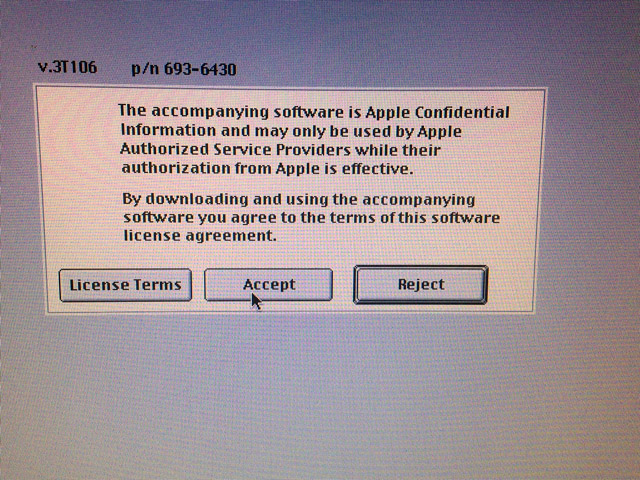
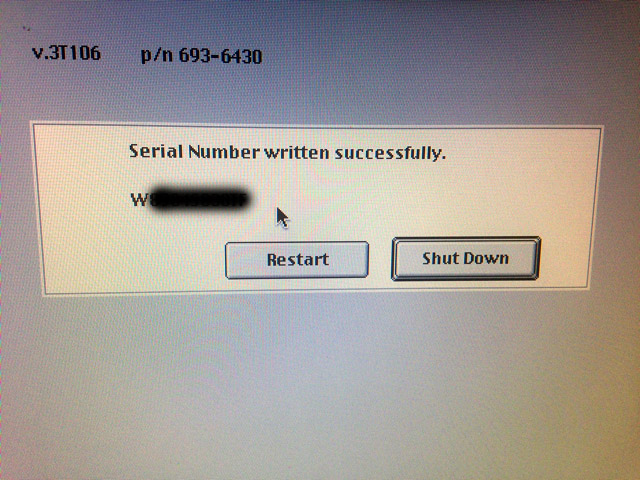
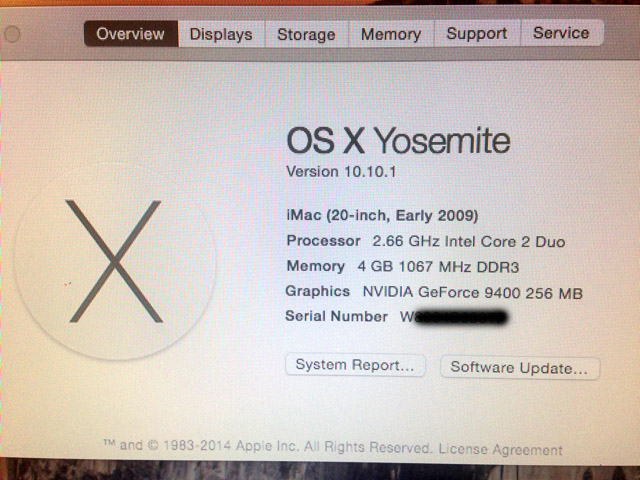
So frustrated beyond belief at this point I decided to download the software. After downloading the disk image I burnt it to a CD and rebooted while holding down the Option key. This causes the Mac to prompt you which device you want to boot from. I told it to boot from the CD and after a few seconds the program popped up. The first screen was agreeing to the license and the default highlighted button was 'Reject'. Ok, I'll just use my Trackpad right? No, because the OS hadn't booted yet my Trackpad wasn't recognized. Fine, I'll just tab between buttons with the keyboard right? Nope. Er, use the arrow keys? Nope. Type the first letter of the button? Nope. Much swearing now ensued. Then I remembered I had an old USB mouse kicking around. So I plugged it in and was able to get a mouse pointer and click on the right buttons. I located the serial number on the bottom of my iMac and entered it when prompted. Note that this only works if there is no serial number. You can not use it to change an existing number. And if you make a mistake with the number you're screwed because as I just said, you cannot change it. Thankfully I entered it in correctly and it said it was successful. Upon booting back into OS X I went and checked About This Mac and it was now registered properly. Great so now I just have to log into Messenger with my Apple ID. Nope. Because now it's telling me in order to use my Apple ID I have to call Apple and give them some code that it generated. Back to the support site I went and entered my phone number for a callback which happened almost instantly. So I explained everything that was going on to the tech and gave him the code. After a few minutes he came back and told me it should work now. I asked why you have to go through this process to get Messenger to run on a Mac when you don't have to for an iPhone or iPad and he basically said that was just the way it is. With everything finally setup I was able to go ahead and test the Notification Center. In the end I like it, despite all the hassles of setting things up. One annoyance is that to receive emails the Mail app needs to be running. Really? Facebook and Messenger don't need to be running and they still work. Sigh. Now granted, most people wouldn't have the problem I had with the missing serial number, but still - Apple's claim to fame is how easy everything is. I can't imagine Mom and Pop type users doing all that just to run a bloody application! Oh well. Now I can get all the messages and updates on my iMac that I get on my iPhone. |


| Out With the Old, In With the New(er) - Oct 13, 2014 | ||
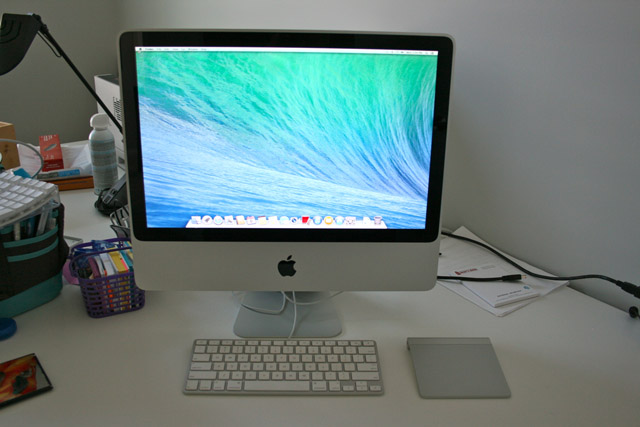
| I'm sure people probably think that with what I do I probably always have the latest, greatest, and fastest computer. The truth is I tend to hang on to my computers for as long as possible. Lately we've been watching more and more shows on Netflix, and I've been wanting to run my wireless network at the fastest speed to ensure the best viewing experience. But I was forced to run it at 802.11n (b/g compatible) as our small 17" iMac affectionately known as Baby iMac doesn't support the faster pure 802.11n standard. So after having used it as our upstairs computer for over 7 years I decided it needed to be replaced. Size was a concern as I wanted to keep a small footprint. Unfortunately they stopped making 17" iMacs a long time ago. The next best thing was a 20" iMac. As I wanted to do this on the cheap I decided not to get a brand new one and instead got one off eBay.
I found a listing for a 2009 model with upgraded memory and purchased it. A few weeks later it showed up and I happily went about setting it up. Unlike my old one which is the white plastic version, this one has the metal enclosure which most people are familiar with. It has a solid feel to it and I quite like it. There were a few bonus items that came with it. Instead of a mouse it came with the Apple trackpad. I was intrigued with them when they first came out, but never had used one. After a few minutes with it I was comfortable not using a mouse. The other cool thing was that it came with the latest Mac OS - 10.9 Mavericks. I've been stubbornly hanging on to Snow Leopard as the last two releases left me unimpressed, but this version is a decent upgrade and feels polished. While the chipset is essentially the same - Core 2 Duo - it has been bumped up from 2.16Ghz to 2.66Ghz and the video card is vastly superior and comes with 256MB of video ram versus the previous 128MB. Finally, the larger screen resolution of 1680x1050 is appreciated. Overall it feels noticeably faster. I still plan on keeping the old one, probably putting it in the garage. So the only question was what to name the new one. Well we have our 17" Baby iMac and our 24" Big iMac with the new one being 20" in size, so it has been dubbed Junior iMac. Welcome to the family! |
| This 'n That - Sep 7, 2014 | ||
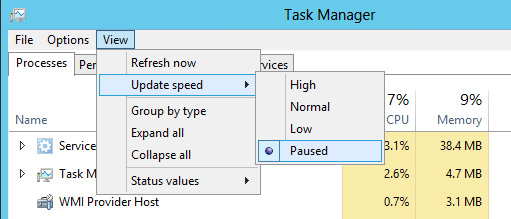
| A couple things came out of the woodwork during what was a challenging week. In the first case I was working on a VMWare cluster that I had installed and found out after the fact that the iSCSI switch it was connected to was set to the default MTU of 1500 and didn't have Jumbo Frames enabled. So Jumbo Frames were enabled and it was changed to match the MTU of the VMWare hosts which was set at 9000. Ok, but how to test that everything was good? Initially I tried doing a ping between the various iSCSI ports and specifying a size of 9000: Ping -l 9000 <ip address>. I got three responses with 0% packet loss. Ok great, it was working properly - or so I thought. Just to be thorough I did a few more tests and started to notice packet drops, sometimes of 33%, sometimes of 66%. Obviously something was wrong. Eventually I stumbled across an article that outlined the proper way to test. Two main items stood out. First, use vmkping instead of regular ping and tell it not to handle oversized packets (fail if there's a problem). Second, the size value you use has to account for some header overhead on the packet. So in reality you need to use a value slightly less than 9000. Here is the correct command to use: vmkping -s 8972 -d <ip address>. Now I was able to successfully verify everything was setup and working correctly. Then, a couple days later, I was troubleshooting an issue whereby our VM backup software was backing up over the wrong network - using the LAN instead of keeping all the traffic in the iSCSI switch. I was on a support call with the vendor and we were using Task Manager to monitor the NIC traffic to quickly verify which network was in use during backups.
Suddenly Task Manager 'stopped working'. We knew the backup was running, but all the networks showed zero activity. It was bizarre. I tried rebooting the server and testing again but got the same result. Then I noticed that nothing in Task Manager was working - the processes weren't updating, the CPU activity was frozen etc. Off to Google I went and thankfully I found the solution right away. For some reason Task Manager was set to be 'paused'. I changed it to update at the Normal speed and everything was fine again. I can only guess that some errant keyboard combination caused it to change the setting. In hindsight I probably should have figured that out on my own, but when you're in the middle of dealing with a problem and one of the basic tools you always use stops working it really throws you for a loop. |
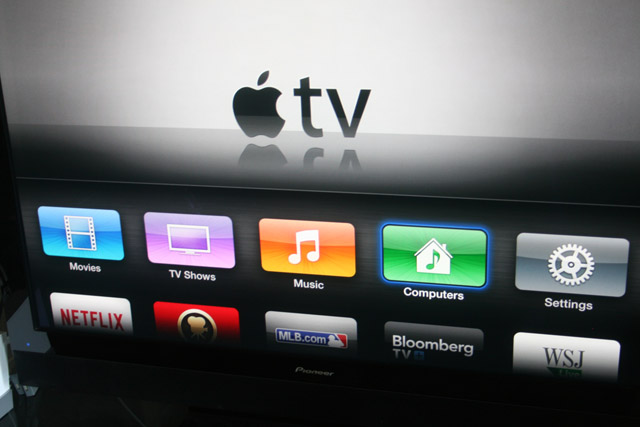
| Apple TV - Jul 29, 2014 | ||||||||||
| One of our favourite TV shows is The Killing. Unfortunately, AMC after having cancelled it (twice) decided not to bring it back for a fourth and final season. Fortunately, Netflix stepped in and the last season will be made available to subscribers on August 1st. In the past I hadn't given Netflix much thought. They used to be a glorified movie rental service with the difference being they'd send you movies in the mail versus you having to go into your local Blockbuster. At some point they made the transition to streaming media empire and are growing exponentially. You could easily argue that they are at the forefront of a fundamental shift in how we watch movies and television. Ok, so how to watch it? We have a so called Smart TV upstairs that is connected to the Internet which offers it as an option. But the problem is in order to have surround sound out of our speakers we'd have to run an optical cable from the TV to our receiver in the basement. Never having anticipated watching anything other than TV or Blu-ray movies we only had HDMI over Ethernet ran when the house was built. So that wasn't an option. Many of the newer Blu-ray players also offer Netflix as a feature, but my players do not as when I bought them I valued quality over features. And I didn't really want to shell out for yet another player.
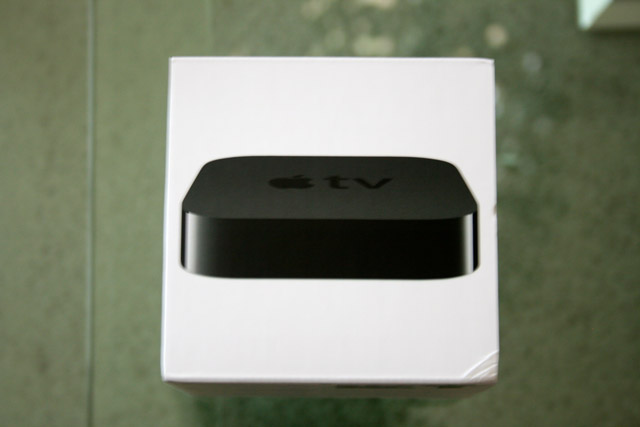
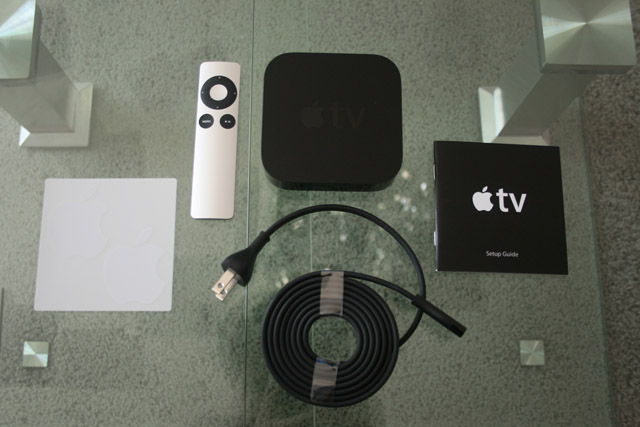
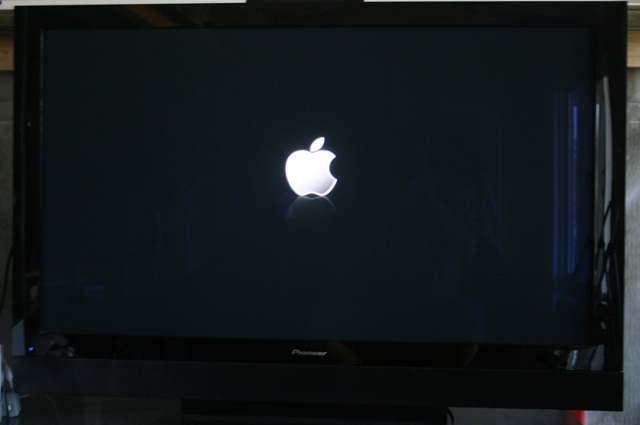
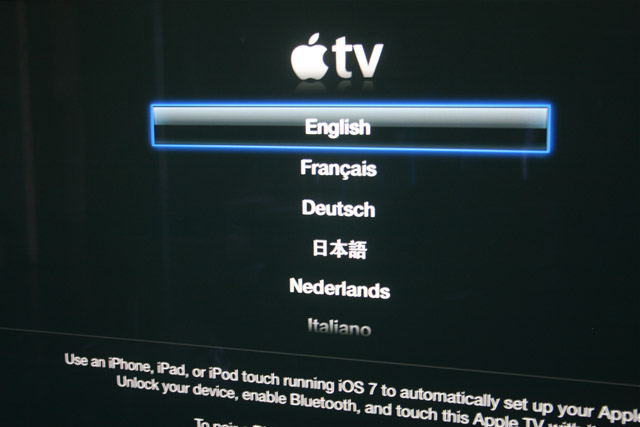
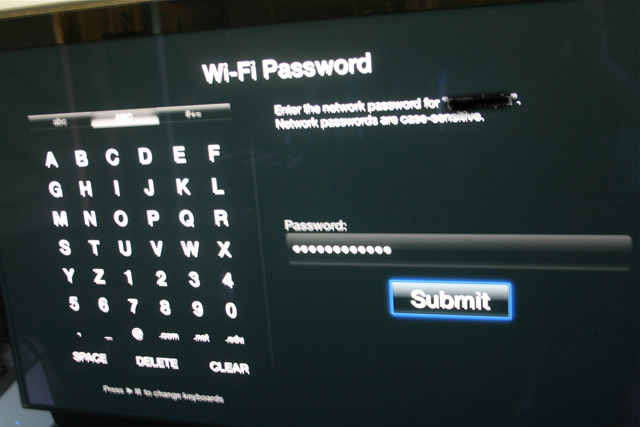
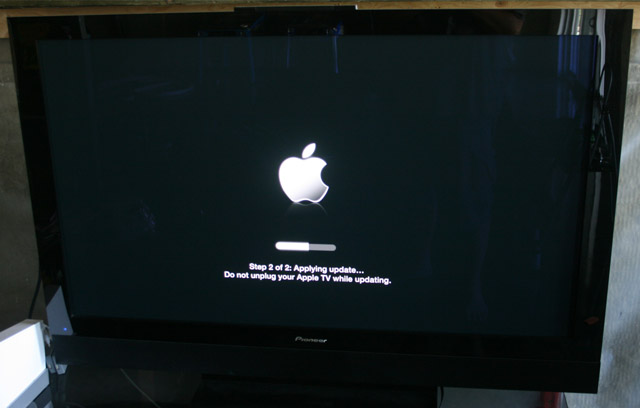
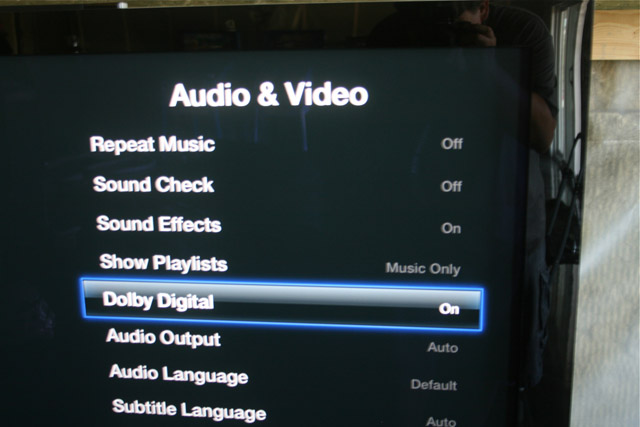
The solution appeared in the form of Apple TV. In addition to being able to stream music and movies from iTunes, it offers Netflix in addition to a number of other streaming services. And as it was only $100 at the local electronics store I decided to bite the bullet and pick one up. I got home, unpackaged everything, and connected it to the TV and receiver downstairs. I ran both HDMI and Optical cables from it to the receiver. HDMI for video and Optical for audio. After selecting my language I then proceeded in hooking it up to my Wi-Fi network. I then had it check for updates which it found and then installed. I shared out my iTunes library and picked one of the movies I had previously downloaded and pressed play.....and was disappointed that it was only playing in Stereo. After doing some quick Googling I found out that I needed to go into the setup and change the Dolby Digital setting from 'Auto' to 'On'. After that everything was playing in surround sound. I then connected to Netflix and signed up for the free 30 day trial. Now it's just a matter of waiting a couple days and we'll be able to watch Linden and Holder solve their final crime. After having used it for a couple weeks, I think that our Apple TV has been a great addition. About the only negatives are the remote. While pleasing to look at, it's a bit small for my hand. Typing in my Wi-Fi password during setup was a real pain for example. I also wish there was a way you could press a button and just have the unit sleep. Instead I have to go back through several menu screens to get to the option. |


| Spam, Spam, Spam - Jun 29, 2014 | |
 You'd think with all the recent scandals, the current Government would maybe want to highlight this as a great victory for us downtrodden citizens... You'd think with all the recent scandals, the current Government would maybe want to highlight this as a great victory for us downtrodden citizens...In a few days Canada's new Anti-Spam law will go into effect. But the only reason I was even made aware of this was from the flood of recent emails from companies I've dealt with in the present or past, or sometimes not at all, sending me emails asking for consent to continue emailing me. So that led me to look up the new legislation and see what all the fuss was about. I did find the official act on the Government website and tried to go through it, but it made my head hurt with it's ponderous wording. So based on various other sources, here then is the gist of the new law:
There's already laws in place that's supposed to prevent this, but companies usually get around it by claiming 'implied consent' - that is unless you say no, they assume you want to receive communications from them. But the biggest change with the new law is the financial penalties. Of course this does nothing to stop you getting emails from companies based outside of Canada. So it looks like I'll still be getting the usual emails from Carnival stating how much they miss me and I really could use another vacation with them. Update: I just had a conversation with Michael Geist, Canada's foremost privacy expert and he has stated this law applies to anyone who sends commercial electronic messages to Canadians. So it looks like companies from other countries are just choosing to ignore it. Due to improvements in technology and crack downs on offenders, it's been awhile since I've received true legitimate spam. I can't remember the last time I got an email for boner pills or asking me to send money to some Nigerian prince. However my Inbox is flooded with emails from various companies which is annoying to say the least. So it'll be interesting to see if this has any real impact or is just more bureaucratic nonsense. If you enjoy reading legalese, the official details can be found here. |
| So Long XP - Apr 18, 2014 | ||
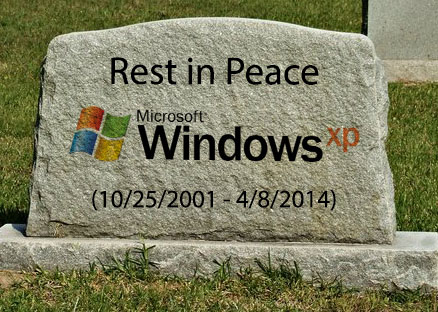
| Unless you are one of the few foreign governments paying huge sums of money to Microsoft for continued support, April's batch of security updates for Windows XP are the last updates it will ever receive. As of April 8th, Windows XP is no longer supported. Period. So if you're still running it, what does that mean for you? Not much really. At least not initially. It will still boot, you'll still be able to run your programs on it, surf the web and so on. However any future security holes (and any existing ones still unpatched) will not be fixed and you'll be left vulnerable. You'll be at risk every time you use it. What to do then? Well, you really should bite the bullet and upgrade. But because most PC's still running XP are fairly old, that likely means buying a new computer. Which probably means having it come with Windows 8.1 (shudder). My personal opinion is that Windows 7 is a better choice for anyone running a Desktop or Laptop (not a tablet). Thankfully, some systems come with downgrade rights to Win 7, and some systems are still sold with Win 7 as an option. If you don't want to fork over your hard earned money for a new system then I'd recommend installing one of the various versions of Linux on it and using it as your new operating system. In addition to running well on older systems, Linux will make all your friends think you're a hardcore computer nerd.
If you still insist on running XP, then use common sense and take the following steps: - Go to Windows Update and make sure you've applied all outstanding updates - If you're not using a hardware firewall, enable the Windows firewall - Make sure you have anti-virus software installed and that it is up to date - Avoid using Internet Explorer and use Chrome or Firefox for web browsing instead For corporations still running XP it's become more and more of a pain installing all the outstanding updates. There have been over 200 updates released since Service Pack 3 came out, so it can take a long time for all of them to install. Thankfully, there's a nifty utility called NLite which you can use to create a customized and fully patched XP DVD. You just need the XP source DVD (SP3 preferred) and then create a repository of all the updates released since and the program will go and integrate them. You can then burn it to DVD and use it as a reference disc for any Virtual or Physical installs. Thereby saving a bunch of time and ensuring you're as secure as possible. XP has had a good run, but it's time to move on. |
| Data Disaster Averted - Feb 15, 2014 | ||
| So I was going through the Event Viewer on our 2008 R2 file server at work and came across this error: Event Type: Error Description: The file system structure on disk is corrupt and unusable. Please run the chkdsk utility on the volume "Drive_letter:" Once again, I immediately felt sick to my stomach. Why? Because the volume that it found file corruption on was almost 10TB in size. Meaning that to fix I'd have to take the volume offline and run chkdsk on it. On a small hard drive that process can take hours, on volume 10TB large it would take at least a week. I don't think our end users would be willing to wait. So what to do? Because the volume was on our SAN, one option was to clone it, point the file server at the clone, and let chkdsk plug away on the original until it was finally fixed, switch everyone back, and then do a final robocopy to update any files that were new or changed. All in all, a big pain in the ass. At some point during my research on this error I came across an article detailing the improvements made to NTFS and chkdsk in Windows Server 2012. Although our new servers have been coming with 2012 installed, I found its Win 8 interface to be annoying as hell. So I wasn't keen to start deploying it everywhere. But this new functionality was a life saver.
In essence it does a daily scan on any attached disks. Any corruption found is logged in a couple of special files. You can then run chkdsk and it's new command 'spotfix' and it'll reference those files so it knows exactly what areas to focus on. You no longer have to wait days, hours, or what would have been weeks for it to finish. So I ran chkdsk on the drive in read only mode and after a couple hours of chewing on it, it came back with the results. I then forced the drive offline and ran the spotfix check on it. The screenshot says it all - 48.1 seconds! With drives and volumes becoming larger and larger, file corruption is more of a problem than ever before. Thankfully with the changes made in Server 2012 the problem is once again manageable. See http://blogs.msdn.com/b/b8/archive/2012/05/09/redesigning-chkdsk-and-the-new-ntfs-health-model.aspx for more details. |

| MDT and Win 8.1 - Jan 18, 2014 | ||
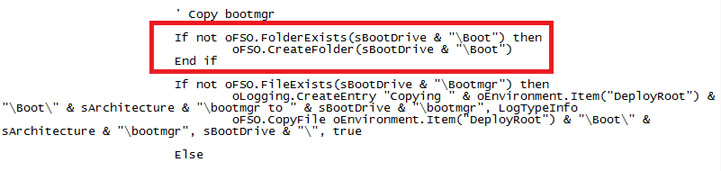
| Recently we've started evaluating tablets at work in the form of Microsoft Surface Pro 2 devices. I won't get into what's the better value between it and the iPad. Frankly I don't care. I think the wide scale use of tablets in the enterprise doesn't make a whole lot of sense. You can have my Desktop when you take it from my cold dead hands... Or course these tablets run Windows 8.1 so it fell upon me to get them integrated into our imaging system which is comprised of Microsoft Deployment Toolkit (MDT). In order to do so, I had to do a number of upgrades. First off, I had to uninstall the Windows Automated Installation Kit (WAIK) and replace with the new Windows Assessment and Deployment Kit (ADK). What's the difference? Not much, really, they essentially do the same thing, however the old version doesn't support Windows 8.1. Of course the catch (there's always one) is the new version doesn't support Windows XP. Seeing as support for XP officially ends in a couple months that really shouldn't be a big deal. Still, I had to remove all the XP drivers and images. Then I found out that our current version of MDT (2012 Update 1) only supported Windows 8, not Windows 8.1. So I had to upgrade to MDT 2013. However, that version doesn't support the host I was running which was Windows Vista. Which meant I had to do a complete rebuild of my system running Windows 7. Sigh. Once that was done I installed ADK and then installed MDT 2013. I then went and upgraded our Deployment shares. At this point everything had gone smoothly. Then I imported the Windows 8.1 DVD into MDT as the base OS, created a capture task, installed 8.1 on a client, ran the Litetouch script to capture the image.....and failure. I had a nice big error dialog laughing in my face: Details … Um, ok. Now what? After much Googling I finally came across a reference on Technet that explained the problem. Despite the new version of MDT being written to deploy 8.1, someone obviously never bothered to actually test it, because anytime you go to capture an image created from the 8.1 media you'll get this error. The fix was to throw in some additional code into the LTIApply.wsf script as shown below. See http://support.microsoft.com/kb/2797676 for more details.
So after making the changes and saving the file I was now able to successfully capture my 8.1 image from a test Desktop. However I still couldn't actually deploy it to any Surface tablets. Apparently in order to successfully PXE (network) boot you can't just use any Ethernet adapter - no that would be simple. Instead, you can only use the particular adapter that Microsoft sells. So it's been ordered and now I wait. But in the meantime.....Look! I can swipe my finger across the touchscreen. Wheee! |